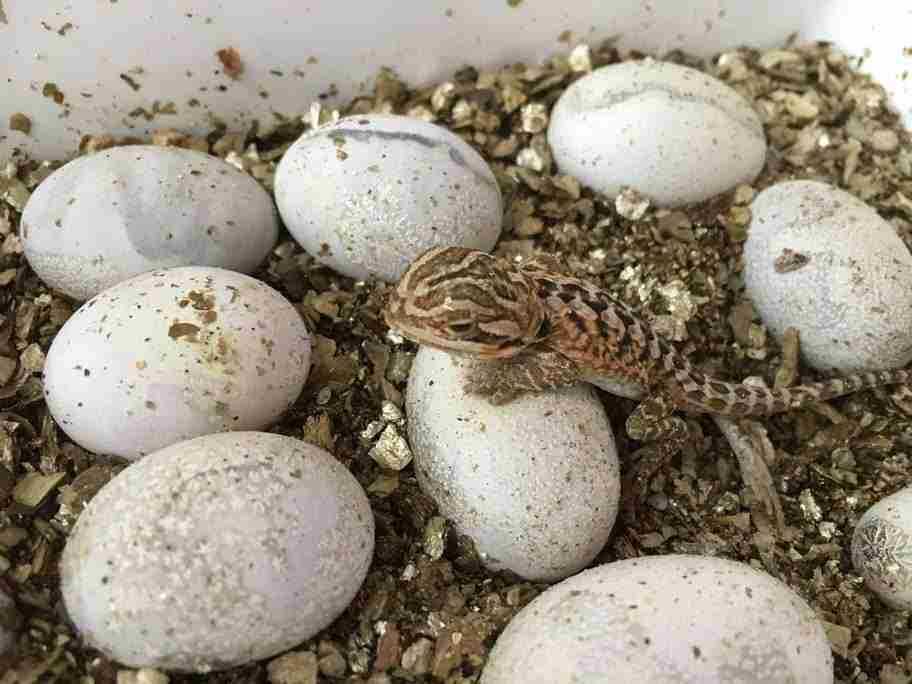
Caring for bearded dragon eggs requires dedication, patience, and knowledge. As you wait for the eggs to hatch into adorable baby dragons, there are several important steps you need to take to ensure the eggs remain healthy and undisturbed. Proper incubation is vital, but you also need to monitor moisture levels, watch for signs of life, and make preparations for the hatchlings’ arrival. With the right approach, you can successfully how to care for bearded dragon eggs.
Set Up the Incubator

Incubating the eggs correctly is crucial for their development. Bearded dragons eggs must be kept at a temperature between 80-85°F and a humidity level around 40%. There are a few options for incubators:
- A purpose-built reptile egg incubator offers the most controlled environment. It allows you to carefully monitor both temperature and humidity.
- An improvised incubator can work as long as it maintains proper heat and humidity. A small tank or plastic container lined with vermiculite is a popular choice. Use a thermometer and hygrometer to track conditions.
- With extreme care, eggs may be incubated communally in the adult bearded dragon’s tank. This is risky though and not recommended for beginners.
The incubator should be set up 1-2 weeks in advance to stabilize conditions. Place it in a room away from drafts or direct sunlight which can impact the temperature. Monitor levels daily and adjust as needed to preserve the ideal environment.
Monitor Moisture in the Incubator
Ensuring the incubator retains proper humidity levels is another critical factor. The vermiculite or perlite medium used should feel lightly damp but not wet. To check moisture, pick up a handful of substrate and squeeze – only a few drops of water should be released.
Moisture can be lost quickly from the incubator environment. Expect to add a small amount of water every few days to maintain around 40% humidity. Be very careful not to oversaturate the substrate, as excess moisture promotes bacterial growth. A hygrometer takes out the guesswork and tracks humidity objectively.
Proper moisture allows the eggshells to remain permeable so the embryos can develop. Too little humidity causes shells to harden before hatching while excessive wetness risks mold taking hold. Getting the balance right takes attentive monitoring and quick adjustments when needed.
Check for Signs of Life
After about 10 days of incubation, you can begin “candling” the eggs to check for growing embryos inside. Candling involves carefully shining a bright flashlight through the shell. A viable egg will glow pinkish-red, with a network of blood vessels visible inside.
Repeat the candling every 5 days or so to monitor growth. Bearded dragon eggs typically show the first signs of life after around 2 weeks. You should see the embryo developing as well as the amniotic sac encircling it. Discard any eggs that remain completely opaque and lifeless after multiple candling sessions.
Advanced hobbyists may try “listening” for heartbeats instead by placing eggs against their ears. But candling gives a much clearer view without disturbing the eggs too much. Keep handling to a minimum during incubation to avoid temperature fluctuations.
Prepare for Hatching
Once embryos are visible, the eggs should hatch within 4-8 weeks. As you reach the expected hatch window (around 55-80 days from laying), take steps to prepare:
- Set up a “hatchling tank” with proper heat lamps, hides, substrate, food dish, and water. This separate habitat reduces competition for resources.
- Add extra humidity to the incubator right before hatching, up to 60%. Moisture softens the eggshells.
- Do not help open the eggs. Allow hatchlings to break out naturally using their egg tooth. Assisting can cause physical harm.
- Discard unhatched eggs after 90 days. Extended incubation times signal non-viability.
- Once hatched, let babies fully absorb their yolk sac before removing them from the incubator. After 2 days, transfer to the hatchling tank.
With preparation and vigilance, you can have great success nurturing bearded dragon eggs through incubation and hatching. Maintaining optimal conditions in the incubator while closely monitoring embryo development takes diligence. But the reward of seeing tiny dragons emerge is well worth the effort.
FAQs About How to Care for Bearded Dragon Eggs
What is the incubation period for bearded dragon eggs, and what should I expect during this time?
The incubation period is approximately 55-75 days. During this time, expect little to no visible changes. Fertile eggs may become slightly opaque, and you might notice subtle movement inside if carefully observed.
Are there signs of distress or problems with bearded dragon eggs, and how should I address them?
Signs of trouble include mold, dimpling, or eggs collapsing. Address these issues promptly by adjusting humidity, ensuring proper turning, and removing any moldy eggs. Seek veterinary advice if problems persist.
When should I prepare for the hatching of bearded dragon eggs, and what steps should I take?
Start preparations a few weeks before the expected hatching date. Create a suitable hatchling enclosure with appropriate heat and UVB lighting, provide tiny food items like insects, and have clean water available.
What should I have ready for the care of baby bearded dragons once they hatch from the eggs?
Prepare a warm, well-lit enclosure with hiding spots and appropriate substrate. Offer small, live insects as their primary food source. Ensure access to clean water and maintain proper temperature and UVB lighting for their health and development.
Can you provide tips for safely handling and caring for bearded dragon eggs during the incubation period?
Handle the eggs minimally and with clean, dry hands. Avoid excessive touching, which can damage the delicate shells. Maintain stable incubation conditions, regularly monitor temperature and humidity, and be patient, as hatching can take time.


